Handrail brackets

Handrail brackets
Every staircase needs a banister. A handrail can be a stylish addition to your staircase as well as providing safety. Guests in particular will feel more secure walking on an unfamiliar staircase if there is something to hold on to. You can make your own banister with handrail brackets, also known as handrail holders.
What do I need to build my own banister?
You will need several materials to build your own banister. For most handrails, these materials will amount to the following list:
- Handrail (beam/pole)
- Screws
- Nylon wall plugs
- Concrete drill bits
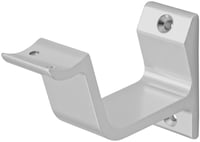
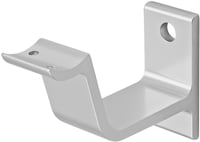
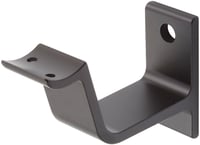
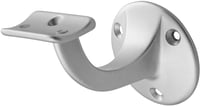
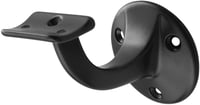
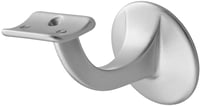
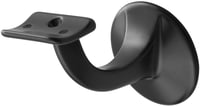
- Handrail brackets
- Wedge bolts (for blind mounting)
You start installing your handrail by determining the position. At what height do you want the banister? The average position of a banister is at about 90 centimetres above the steps. This is also the height where you install the handrail brackets.
Installing the handrail
- Determine the height of the handrail.
- Start by temporarily attaching the handrail brackets to the handrail. Bear in mind that the brackets should be at the same distance from each other and from the ends of the handrail.
- To make sure you get the same height everywhere, mark this on the wall in various spots.
- Ask someone to hold the handrail at the required height, while you mark the position of the bottom mounting hole in the brackets. This way, you will know where to drill.
- Drill the holes and insert the nylon wall plugs.
- Detach the handrail brackets from the handrail and attach them (temporarily) to the wall using only the mounting hole on the bottom.
- Place the handrail on the brackets. Because the brackets are only fixed with one screw, you will be able to turn them to the right position, so they align perfectly with the handrail.
- Mark the other mounting holes. Drill the other holes and insert the nylon wall plugs.
- Secure the handrail brackets to the wall.
- Attach the handrail to the brackets.
We recommend keeping a distance of 60 to 80 cm between the different handrail brackets.
Installing a banister with wedge bolts
Part of the handrail brackets that we offer has to be installed using blind mounting. This means you will not see the screws in the brackets. For the most part, installing a handrail with these brackets is the same as with normal handrail brackets, apart from the following steps:
- Mark the perimeter of the backplate instead of the mounting holes (step 4). Then determine the middle of the circle by drawing straight, diagonal lines in the circle.
- Drill a 14 mm holes in the middle of the circle (step 5). Insert the wedge bolts and tighten them with a combination spanner.
- Secure the handrail bracket to the wall by twisting in onto the wedge bolt.
As soon as the handrail brackets are fixed to the wall, you can attach the handrail to the brackets with 4 mm screws.
Height handrail brackets
As said before, the average height of a banister is 90 cm. To ensure this height is the same everywhere, you will have to measure this at a minimum of 2 points on your staircase. At the top and bottom of the staircase, mark a distance of 90 cm above the step. You can also use masking tape to show the hole length of the handrail on the wall. This also simplifies installing the handrail brackets.
Ordering handrail brackets
Build your own banister with materials from Wovar. Do you own a business in the construction or landscaping sector? Enjoy many advantages with a business account.
Still looking for fasteners? Have a look at our vast collection of screws, bolts, and wall plugs.